How can I integrate VoIPStudio?
Start by following this link to the Administration page and the User View: https://voipstudio.com/app/#users
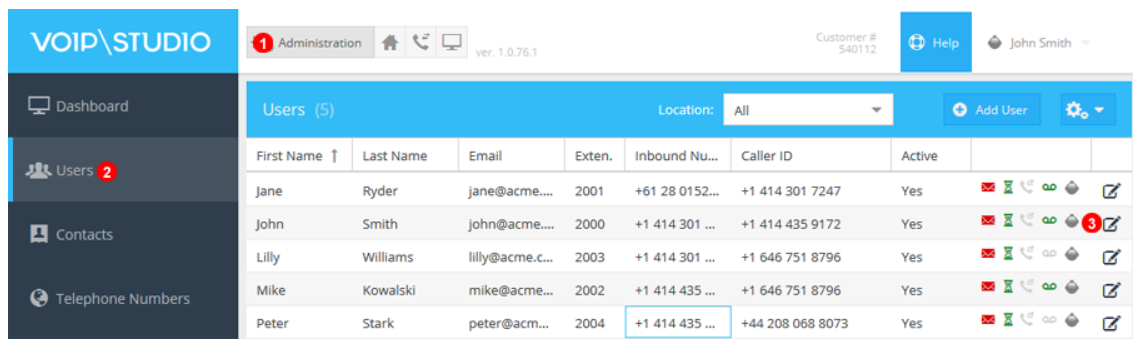
- Make sure you are on the Administration page.
- Select Users as shown on the left.
- Click the Edit Icon to open additional user information.
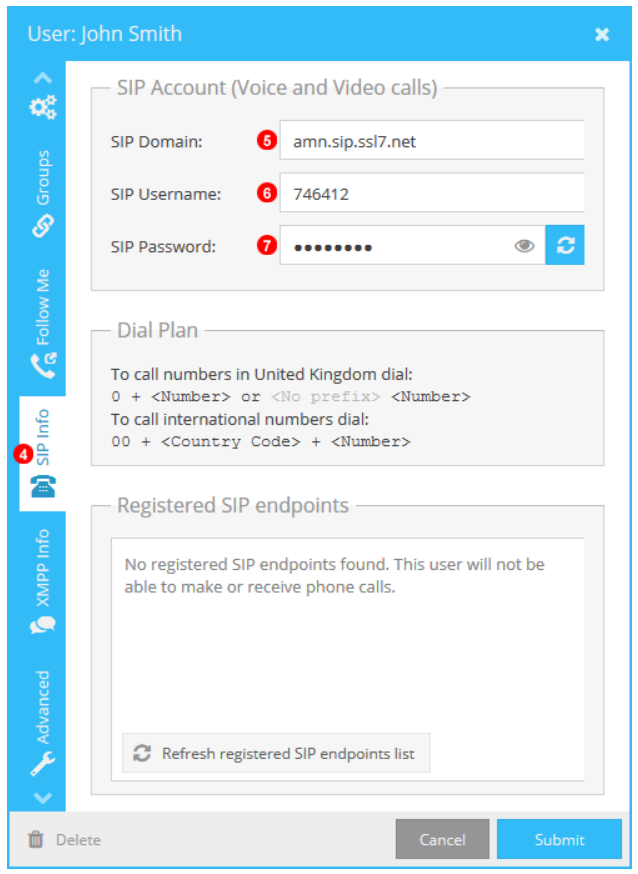
- Select SIP Info, move cursor over the Tab on the left of the Edit User window and scroll down to reveal additional Tabs.
- SIP Domain as used in Step 7 of Taxicaller Settings below.
- SIP Username as used in Step 6 of Taxi Caller Settings below.
- SIP Password as used in step 4 of Taxi Caller Dispatch.
Taxi Caller Settings
Link to Taxicaller Settings: https://portal.taxicaller.net/dispatch/users/edit
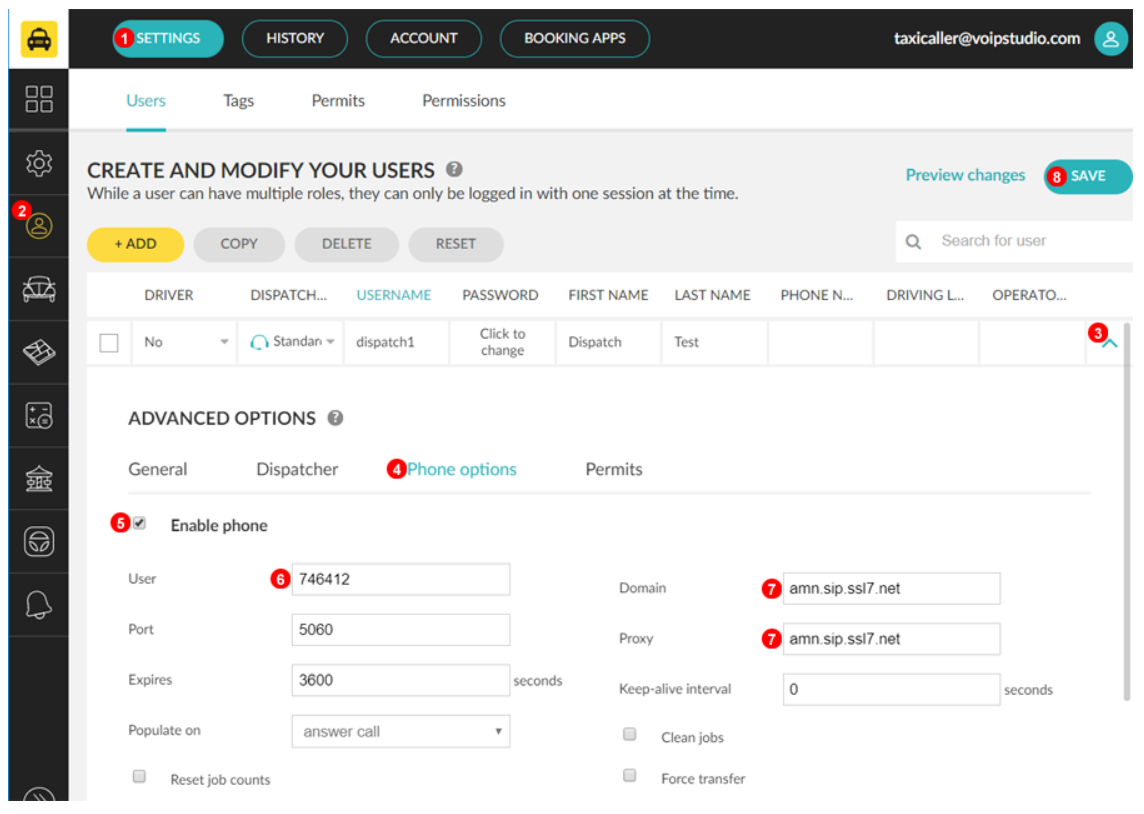
- Click On Settings.
- Select Users.
- Expand the Dispatcher you wish to enable the Softphone for.
- Select Phone Options.
- Enable Phone.
- Fill In 6 Digit VoIPStudio SIP User name shown in Image below.
- Fill In VoIPStudio Domain eu or amn as shown on your account.
- Click Save to complete.
Taxi Caller Dispatch

Please follow this link Directly to Dispatch Login: https://portal.taxicaller.net/login/dispatch
- Select Dispatch.
- Login and select Install Softphone open download and then install, additional Java might be required if so please follow prompts. NOTE: Always check that the publisher details are correct when downloading to ensure the security of your device.

- Match 6 Digit user with Auth-ID.
- Enter SIP Password as shown on Figure 9.31
- Click Connect to complete if configured correctly the app will change to Registered.
The Integration between VoIPStudio and Taxi Caller is now complete and ready to use.
Was this article helpful?
Votes:
5