
While the creation of tariff zones is optional, you need to add at least one schedule before you can establish the tariffs in the next section. The simplest schedule you can add is a single Standard one that covers everyday at all times. However you can also create different schedules to set up different prices depending on the day or the week or time of the day.
 and Fri-Sun (in yellow)")
Creating a Tariff Schedule
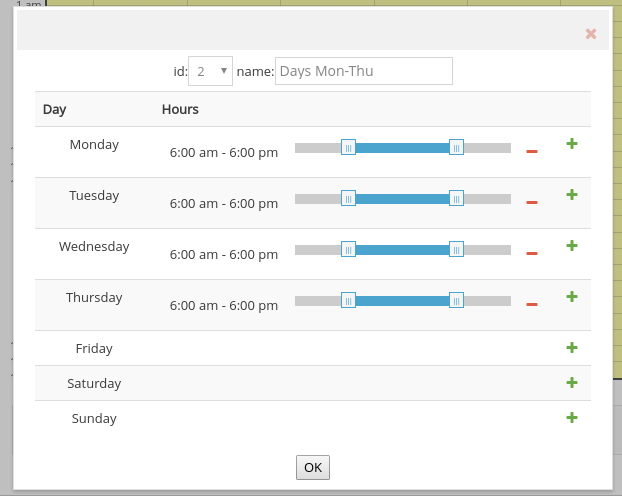
- In the Tariffs section in the Admin Panel, click on the second tab 2. Schedule.
- Scroll down until you find the Create button. Click on it.
- A new panel will pop up in your screen, in which you can select the times for your schedule. Click on the plus sign (+) for each day of the week.
- Drag the sliders with your mouse or the arrow keys in the keyboard to adjust the time.

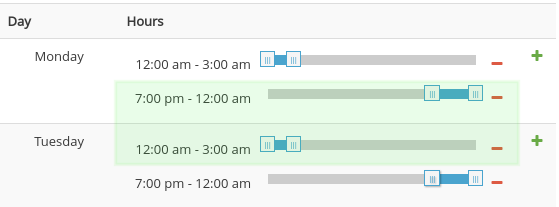
- You can add two different time sections to the same day by clicking on the plus (+) sign again to bring out another slider. The only restriction is that the earlier time should be placed on the top slider.
For example if you want a tariff that applies from 7:00 pm to 3 am on the next day, you’d have to add two different bars, one for the previous day until midnight and another for the next day from midnight on.
- After configuring the time for all the days, click on the OK button.
After you have created the schedules you need, don’t forget to press on the Save button or your changes won’t be recorded.