In this section, you will be able to define the zones in which you would like to provide cab services.
Tariff zones are used to create specific tariffs that you want to apply when billing. On the contrary, the zones in this section define the areas where you will be able to assign jobs, in other words, the zones in which you want to operate.
Create and Modify your Assignment Zones
If your company covers a large area, you might need to divide it into zones, in order to determine how would you like to assign the drivers into the jobs.
Adding a New Zone
Click on the Add Zone button. It will enable a green dot on the map where you can draw the zone by clicking into the map. You can zoom in and out of the map by using the scroll wheel of your mouse, or by clicking on the + and – signs at the left corner of the map.
Once you have drawn the zone, give it an id and name, these are the only obligatory fields. You can then configure the rest as will be explained below, or you can click on Done button at the bottom of the menu. Save the changes before leaving the page.
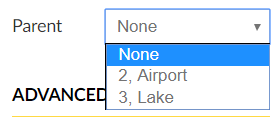
Under the parent option, you can select if you want to define the zone as a child of another zone. This function will enable that, the rules assigned to the parent will be also reflected in the children. This option, for example, is useful when defining Taxi stands, where you will need to create a specific assignment zone (child zone) for the taxi stand to operate inside a bigger zone (parent zone).
Advanced Options
The default behavior for zone queues is that the vehicle that has waited for the longest in the zone will get assigned first. The Assign from section is an advanced optional setting that you can use if you want to give preference to available cars in a different zone.
Check the option “Require passenger in this zone to enter flight number on” if you want to establish as mandatory that the passenger when booking enters the flight number, for example in Airport Zones.
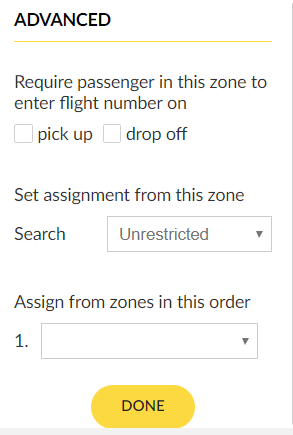
Set assignment
Will allow you to assign a job under different options from where the pick-up of the job was made. For example, let’s say that your company has a big zone of operation, by enabling this option you could select that the job is only assigned to vehicles that are located within 10 kilometers from the job-pickup.
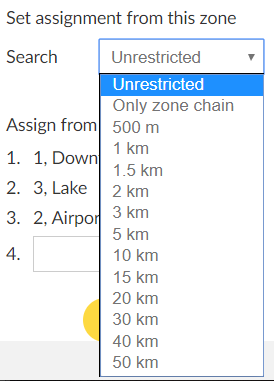
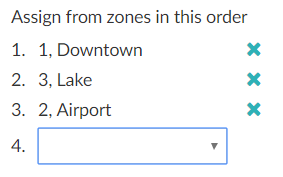
Assign from
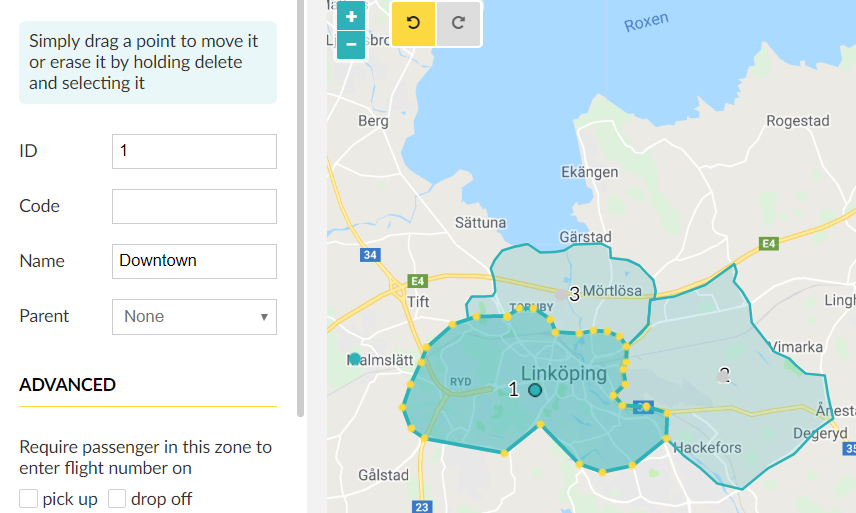
You can also add the order for the system to assign the jobs. For example, in the following the system will prioritize to assign the jobs first 1. Downtown, then 3.Lake and finally the drivers that are in 2.Airport.
Is taxi rank
The taxi rank feature is a part of the advanced assignment zone configuration and allows you to define one, or multiple zones as “taxi ranks” to help manage and improve the t-time calculations on pre-booked jobs.
Make sure “Is Taxi Rank” is checked to enable the feature for the particular zone you are editing.![]()
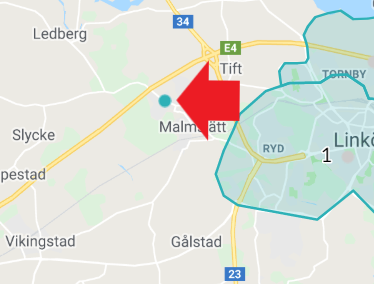
Drag and drop the blue dot where you want the center point to be placed for the zone (see arrow in screenshot below).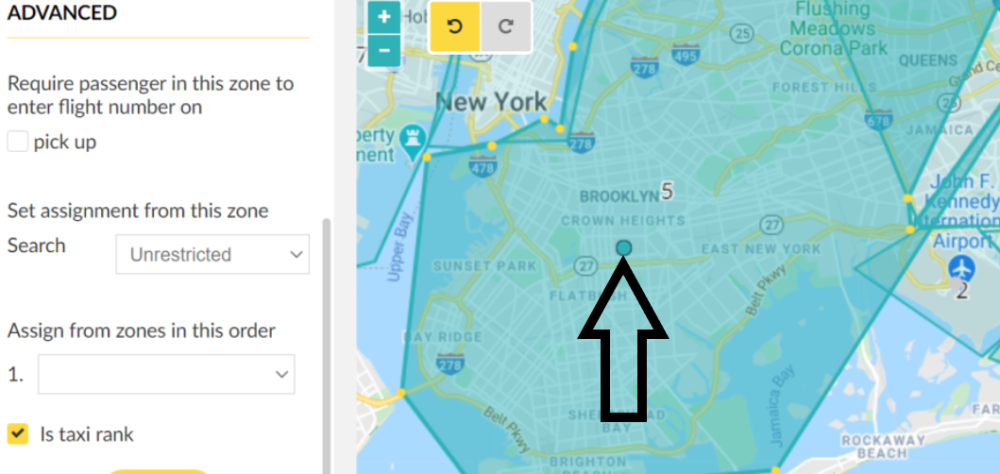
This will now be the center point at which the -T time is calculated for that particular zone.
What happens when no taxi rank is enabled?
When no assignment zones are designated as Taxi Ranks, the system will continue to calculate the t-time using the default center point of the company’s service area.
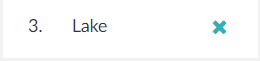
To delete zones from the list, simply click on the cross beside the name of the zone.