Introduction
The timeline is designed to offer a clearer overview of the workload of your company.
It is best suited to users who work with large numbers of prebookings, providing a calendar-style overview of your vehicles, their assigned jobs, transit times, and any unassigned jobs. The timeline helps you identify potential scheduling conflicts and fix them by simply dragging and dropping the jobs. You’ll see prompts for late arrivals and you’ll be able to react faster to ensure your passengers are collected on time.
For the most optimal use case, the timeline should be used with the automatic assignment setting “Assign directly” selected. For more information about these settings, please refer to this part of the manual.
Enabling the timeline
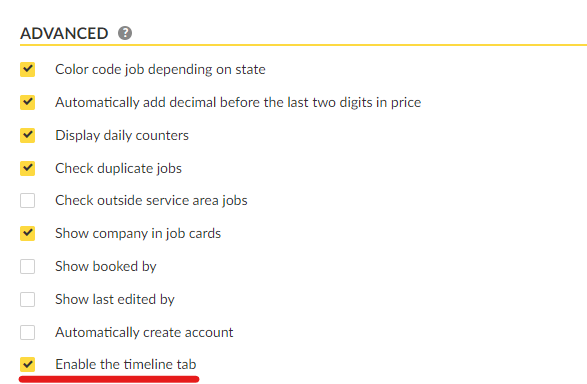
To enable the timeline on your account, please go to “https://app.taxicaller.net/dispatch/settings/general” and under “Dispatch panel”, show the advanced options. Check the box below.
h2. Structure of the timeline
The timeline is separated into different parts as follows:
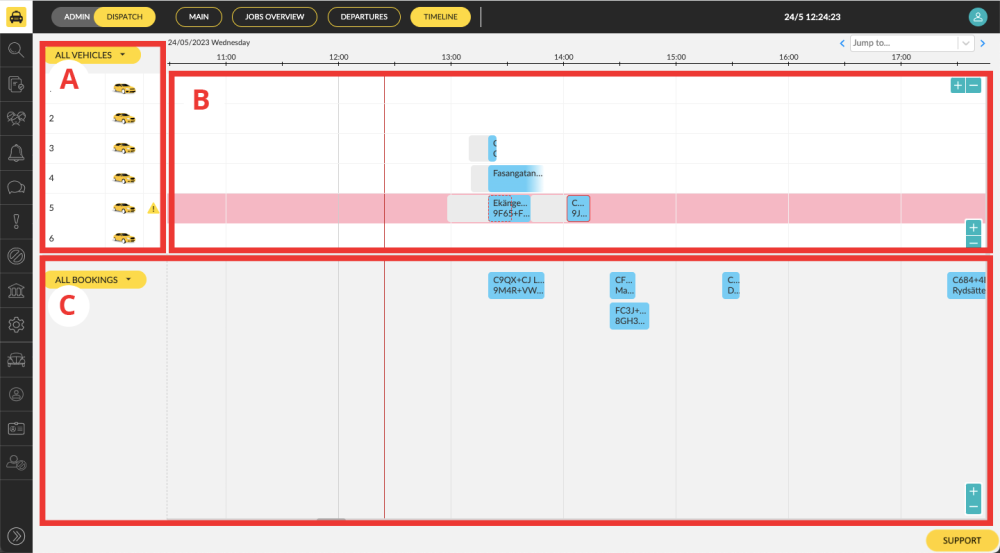
Vehicle List A
The lists on the left side show the ID and icon of all vehicles on your account as well as warnings if jobs collide for specific vehicles. The standard sorting of the vehicles is numerical.
Assigned Jobs B
All assigned jobs from different booking channels are shown here, including ASAP jobs.
Unassigned Jobs C
The lower part of the screen shows all the unassigned pre-booked jobs. The jobs are sorted according to time along the timeline, and stacked according to the creation time.
Timeline
The unassigned and assigned jobs are aligned with the timeline at the top of the screen. Jobs can only be moved vertically, not horizontally.
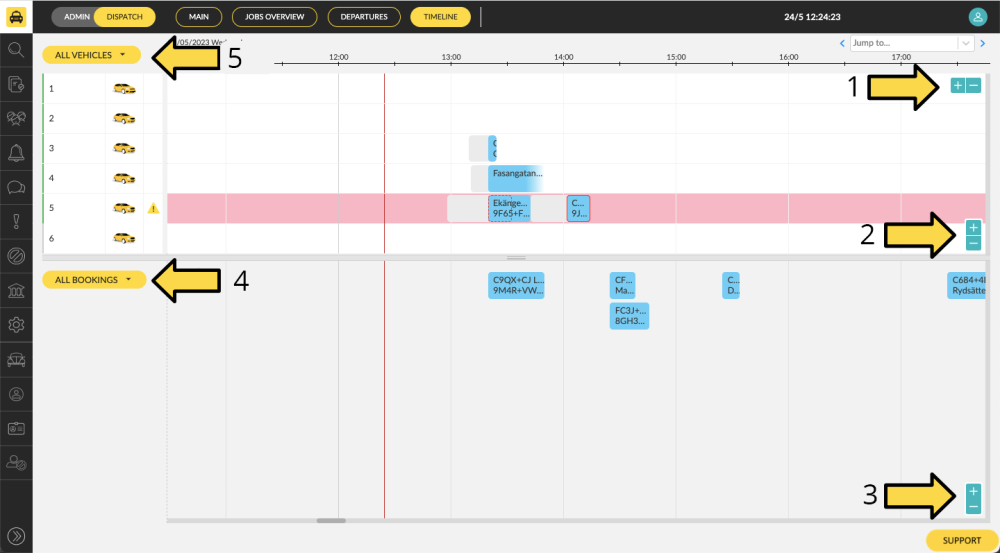
Timeline + –
With the + – at the top right (1), it is possible to zoom in and out of the timeline to show a shorter or longer range of time.
Vehicle list + –
With the + – in the middle (2), it is possible to zoom in and out of the jobs vertically to expand or decrease the sizes.
Unassigned jobs + –
Through the + – button in the right lower corner (3), it is possible to extend or decrease the size of the jobs to get more information or a general overview.
Filter Jobs
With the lower filter on the left (4), it is possible to filter for certain jobs. It is also possible to create new filters. To create a filter, click on the “All booking” drop down and select “Manage filters”. Press “New,” and give the filter a name. Then add a condition by pressing “Add another condition.” In the drop down menu, select the condition that you want to filter. It is also possible to modify the conditions to make them more precise. Once this is done, press “Save” and select the filter in the filter list to apply it to the unassigned jobs.
Filter Vehicles
The filter in the top left (5) is filtering the vehicles according to different categories. It is also possible to create new filters.
To create a filter, click on the “ALL VEHICLES” drop-down, and select “Manage filters.” Press “New” and give the filter a name. Then add a condition by pressing “Add another condition.” In the drop down menu, select the condition that you want to filter. It is also possible to modify the conditions to make them more precise. Once this is done, press “Save” and select the filter in the filter list to apply it to the timeline.
Red line
The narrow red line on the timeline represents the current time.
Working with the timeline
To assign an unassigned job, drag the job that should be assigned to the line of the vehicle that should execute the job.
To drag, hold the cursor over a job and then click and hold it. Then, pull the job to the desired destination and release the cursor. The job will be dropped on the job line.
Jobs can also be unassigned by dragging them from the timeline to the unassigned jobs list.
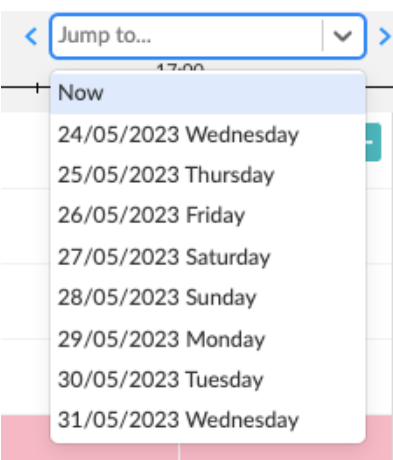
Jump to…
The “Jump to…” function makes it possible to move quickly to another date that is either now or in the future. The drop-down gives the option to jump to any date up until one month in the future. It is also possible to use the arrows (left and right) to move one day forward or one day back, instead of choosing from the list.
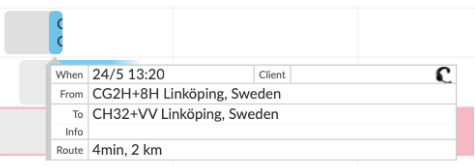
Hovering over Job Card
When hovering over a job card with the cursor, more information about the job appears. It is possible to click the job to get back to the editing menu.